Golf carts rely on solenoids to regulate their electrical systems and power the motor. However, like any other electrical component, solenoids can fail and cause the golf cart to stop working.
Bypassing a solenoid can be an easy fix to get the golf cart up and running again. That’s why you should learn how to bypass a solenoid on a golf cart correctly, so that you can tackle the issue effectively.
In this article, we’ll walk you through the steps to safely and effectively bypass a solenoid on a golf cart safely and effectively. Please note that bypassing a solenoid can be dangerous, so it should only be done by experienced professionals or under the guidance of a professional.

How to bypass a solenoid on a golf cart? (The Process Explained)
To bypass a solenoid on a golf cart, you will need the following:
- Safety gear: Gloves and safety goggles to protect yourself while working.
- Wrenches and screwdrivers: To remove the necessary parts and access the solenoid.
- Jumper cables: These will be used to connect the battery to the motor and bypass the solenoid.
- Voltage meter: To measure the voltage and ensure the bypass works correctly.
- Wiring diagram: A diagram of the golf cart’s electrical system to help you identify the solenoid and the wires that need to be connected.
- Replacement solenoid (optional): If the solenoid is faulty, you may need to replace it, so it’s a good idea to have a replacement on hand.
- A helping hand: Bypassing a solenoid can be tricky, so it’s helpful to have a second person assist you, hold the wires in place, or turn the key as needed.

Step 1: Safety Considerations
Working with a golf cart’s electrical system can be dangerous, so safety is paramount. The electrical system in a golf cart contains high voltages and currents that can cause serious injury or even death if mishandled.
It’s essential to wear appropriate safety gear, such as gloves and safety goggles, when working on the golf cart’s electrical system.
Additionally, it’s crucial to clearly understand the golf cart’s electrical system and have the necessary tools and equipment to work on it safely. If you’re unsure about any aspect of working with the golf cart’s electrical system, it’s best to seek the help of a professional with the knowledge and experience to work on it safely.
Disconnecting the golf cart’s battery is an essential safety step before working on its electrical system. Here are some tips on how to do it safely:
- Wear protective gear: Wear gloves and safety goggles to protect yourself from any potential electrical hazards.
- Turn off the golf cart: Turn the key off and remove it from the ignition to ensure it is not receiving any power.
- Identify the battery: Locate the battery compartment and remove any covers or panels.
- Disconnect the negative terminal: Use a wrench or pliers to loosen it and disconnect it from the battery. Be careful not to touch the positive terminal with any metal tools.
- Secure the negative terminal: To prevent the negative terminal from contacting the battery, wrap it with electrical tape or cover it with a plastic bag.
- Confirm disconnection: Use a voltage meter to verify that the battery is disconnected before starting work.
Step 2: Locate the Solenoid
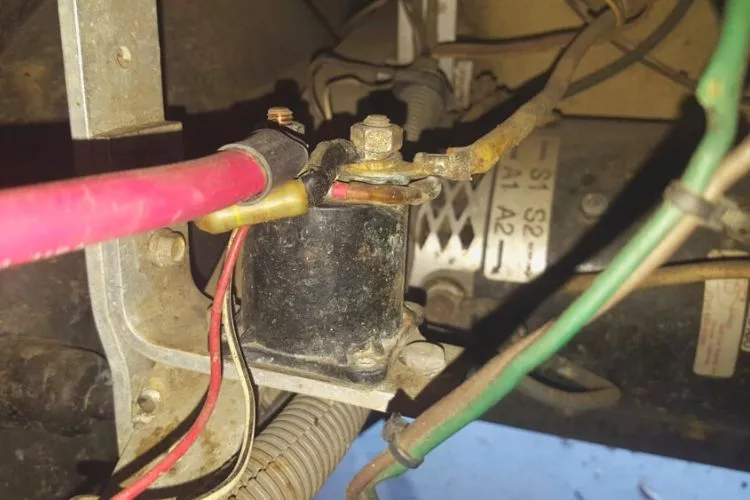
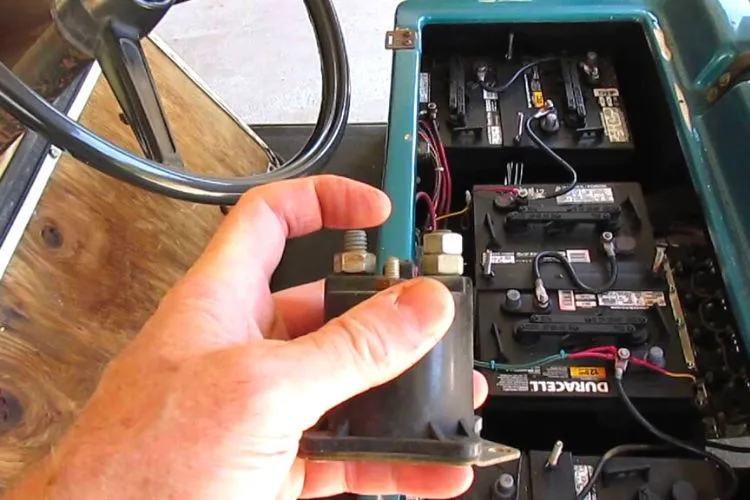
The solenoid in a golf cart is usually located near the battery compartment and the motor. It’s often attached to the frame or chassis of the golf cart and is visible from the rear or underside of the cart. The solenoid is cylindrical with wires connected to it and is usually around 3 to 4 inches in length.
The exact location of the solenoid can vary depending on the make and model of the golf cart. Typically, it’s located near the controller, which regulates the power flow to the motor.
Finding the solenoid is essential in bypassing it or troubleshooting any issues with the golf cart’s electrical system.
Finding the solenoid in your specific golf cart can be tricky since its location can vary based on the make and model. Here are some tips on how to locate the solenoid in your golf cart:
- Consult the owner’s manual: The owner’s manual often contains a diagram of the golf cart’s electrical system, including the location of the solenoid.
- Look for wires: Follow the wires from the battery compartment and the motor, and you’ll likely find the solenoid nearby.
- Check the frame: The solenoid is typically attached to the frame or chassis of the golf cart and may be visible from the underside or rear of the cart.
- Ask for help: If you’re having difficulty finding the solenoid, ask for help from a professional mechanic or someone familiar with your golf cart’s specific make and model.
Step 3: Remove the Wires
To bypass the solenoid in a golf cart, you need to remove the wires that connect the solenoid to the rest of the electrical system. Typically, two wires need to be removed: the wire that runs from the battery’s positive terminal to the solenoid’s input terminal and the wire that runs from the output terminal of the solenoid to the motor.
Once these wires are removed, you can connect the battery’s positive terminal directly to the motor using jumper cables. This bypasses the solenoid, allowing you to power the motor directly from the battery.
However, it’s important to consult the wiring diagram for your specific golf cart to ensure you remove the correct wires and avoid damaging any other parts of the electrical system.
Disconnecting wires from a golf cart’s electrical system requires proper care to prevent damage to the system. Here are some tips to help you safely and correctly disconnect wires from the golf cart’s electrical system:
- Turn off the golf cart: Ensure the golf cart is turned off and the key is removed from the ignition.
- Identify the wires: Use a wiring diagram or label the wires to ensure that you’re disconnecting the correct wires.
- Use the right tools: Use a wire crimper or pliers to loosen the wire connectors, and avoid using metal tools that can cause a short circuit.
- Mark the wires: Use colored tape or markers to distinguish which wires go where, making reassembly easier.
- Store the wires properly: Coil up them neatly, and use zip ties or electrical tape to keep them secure and prevent any damage to the insulation.
Step 4: Connect the Wires
To connect the wires to bypass the solenoid in a golf cart, follow these steps:
- Disconnect the wires: First, disconnect the two wires that connect the solenoid to the battery and motor, as mentioned earlier.
- Connect the positive cable: Use a jumper cable to connect the positive terminal of the battery directly to the positive terminal of the motor.
- Secure the connection: Use zip ties or electrical tape to secure the connection between the battery and motor, ensuring the wires don’t move around or come loose.
- Test the connection: Turn on the golf cart and test the motor to ensure it works properly.
Properly connecting the wires is crucial to ensure your golf cart functions correctly. Here are some tips on how to properly connect the wires when bypassing the solenoid:
- Use the correct gauge wire: Use the correct gauge wire for the golf cart’s electrical load. This ensures the wire can carry the required current without overheating or causing other problems.
- Check wire connections: Ensure that all wires are clean and tight, and use a wire crimp tool or pliers to ensure a secure connection.
- Check battery voltage: Check the battery’s voltage to ensure it’s fully charged and able to supply the necessary power to the motor.
- Inspect wiring: Inspect the wiring carefully for any signs of damage, such as frayed or exposed wires. Replace any damaged wiring before connecting the wires to avoid future issues.
- Test the golf cart: Before taking it for a spin, test the electrical system to ensure it’s functioning correctly. This includes checking the headlights, turn signals, and horns.
Step 5: Test the Golf Cart
Testing the golf cart after bypassing the solenoid is essential to ensure the electrical system functions correctly. Bypassing the solenoid can cause several issues if not done correctly, such as blown fuses, damaged wiring, and even harm to the motor or battery.

Therefore, testing the golf cart is important to identify any issues that may have occurred during the bypass process. Testing includes checking the golf cart’s headlights, turn signals, horns, and other electrical components.
Also, you should test the acceleration, top speed, and battery performance to ensure the golf cart functions correctly. Proper testing after bypassing the solenoid ensures your safety and the safety of others while using the golf cart.
Testing the golf cart after bypassing the solenoid is critical to ensure it functions correctly. Here are some tips on how to test the golf cart after bypassing the solenoid:
- Check the lights: Turn on the headlights, taillights, and brake lights to ensure they function correctly.
- Test the horn: Press the button to ensure it works correctly.
- Check the motor: Test the acceleration and top speed of the golf cart to ensure the motor is working correctly.
- Check battery performance: Check the battery voltage before and after using the golf cart to ensure it holds a charge.
- Take it for a test drive: Take the golf cart for a test drive, paying attention to any unusual sounds, vibrations, or problems.
How do I know if my solenoid is bad on my electric golf cart?
Several signs may indicate a bad solenoid on your electric golf cart. One of the most common signs is a clicking sound when trying to start the golf cart. This indicates that the solenoid is engaging but failing to deliver power to the motor.

Another sign of a bad solenoid is a golf cart that won’t start or move even though the battery is fully charged. This suggests that the solenoid is preventing power from reaching the motor. Additionally, if the golf cart moves slowly or lacks power, this could also indicate a bad solenoid.
Lastly, if you notice that the solenoid is hot to the touch, it could indicate that it’s malfunctioning and potentially causing other problems with the electrical system.
If you experience any of these symptoms, it’s important to have the solenoid tested or replaced by a qualified technician to ensure the safety and functionality of your golf cart.
Can you repair a solenoid?
In some cases, a solenoid can be repaired. However, it depends on the damage’s extent and the solenoid type. Simple repairs, such as cleaning or replacing the contacts, can be done by a qualified technician.
However, if the solenoid is severely damaged or burned out, it’s often more cost-effective to replace it rather than repair it. Additionally, if the solenoid is an integral part of a larger electrical system, it may be better to replace the entire system to ensure compatibility and avoid further issues.
Ultimately, the best course of action is to have a qualified technician evaluate the solenoid and advise whether to repair or replace it.
Conclusion:
Bypassing a solenoid on a golf cart can be a complicated process, but it’s a useful skill to have in an emergency. It’s crucial to prioritize safety and follow the correct steps to avoid damaging the electrical system.
Remember to properly disconnect and connect wires and test the golf cart thoroughly to ensure it functions correctly. If you’re unsure or uncomfortable with bypassing a solenoid, it’s best to consult a qualified technician.
By following these tips, you can safely and effectively bypass a solenoid on your golf cart safely and effectively.
